
TiviMate for Windows: How to Install Tivimate IPTV Player on Windows 10 or 11
Introduction
TiviMate has gained a stellar reputation as one of the most reliable and feature-rich IPTV players available for Android devices. Its modern and intuitive interface, combined with functionalities like channel grouping, EPG (Electronic Program Guide) support, and seamless multi-device syncing, has made it a top choice for IPTV enthusiasts. But what if you’re looking to enjoy this exceptional streaming experience on your Windows PC instead?
In this comprehensive guide, we’ll walk you through the detailed steps to successfully install and run TiviMate on Windows 10 and 11. We’ll cover the essential tools and software required for the process, as well as provide practical tips on how to fine-tune and optimize the application to ensure you enjoy the best possible streaming experience on your device.
Whether you’ve been a dedicated TiviMate enthusiast for years or you’re just beginning to explore the world of IPTV players for the very first time, this article is designed with you in mind.
Method 1: Install TiviMate from the Microsoft Store (Official Version)
✅ Step 1: Open Microsoft Store
- On your Windows 10 or Windows 11 computer, launch the Microsoft Store application by navigating through your Start menu or using the search bar to quickly locate it.
✅ Step 2: Search for TiviMate
- In the search bar, carefully type TiviMate IPTV Player to ensure accuracy and make it easier to locate the specific application you’re looking for.
- Find the application created and released by HFR TECH LLC, the official and verified publisher.
✅ Step 3: Install the App
- Click on Get or Install to begin the process.
- After successfully completing the installation process, navigate to your Start Menu and locate the newly added application. Click on it to open and begin using the app.
✅ Step 4: Configure Your Playlist
- Include your M3U URL or Xtream Details to access your playlist, along with the EPG guide for comprehensive program schedules, and customize your channel list to suit your preferences and needs.
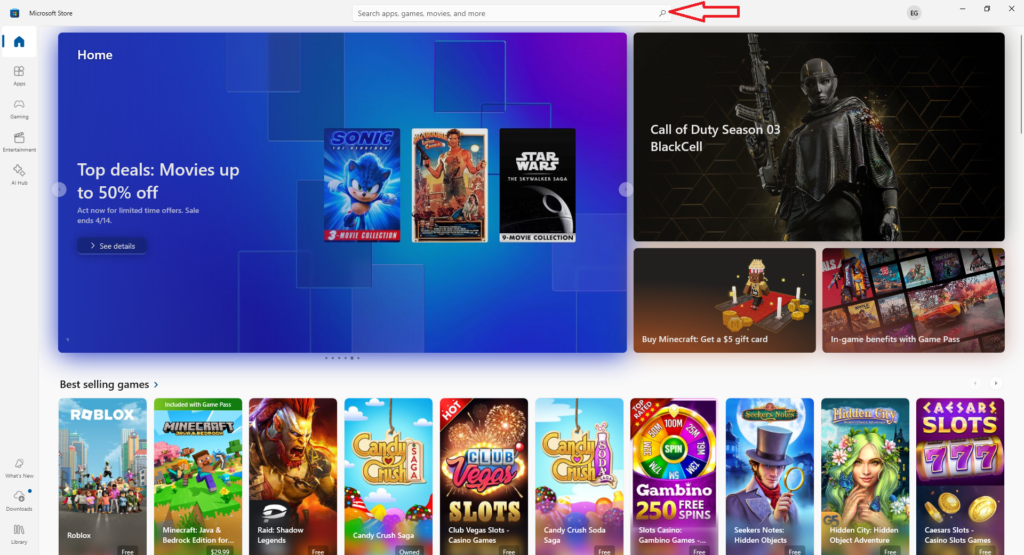
Step 1: Open the Microsoft Store by pressing the Windows key on your keyboard.

Step 3: Search for TiviMate, and you will find an app called “TiviMate IPTV Pro.”
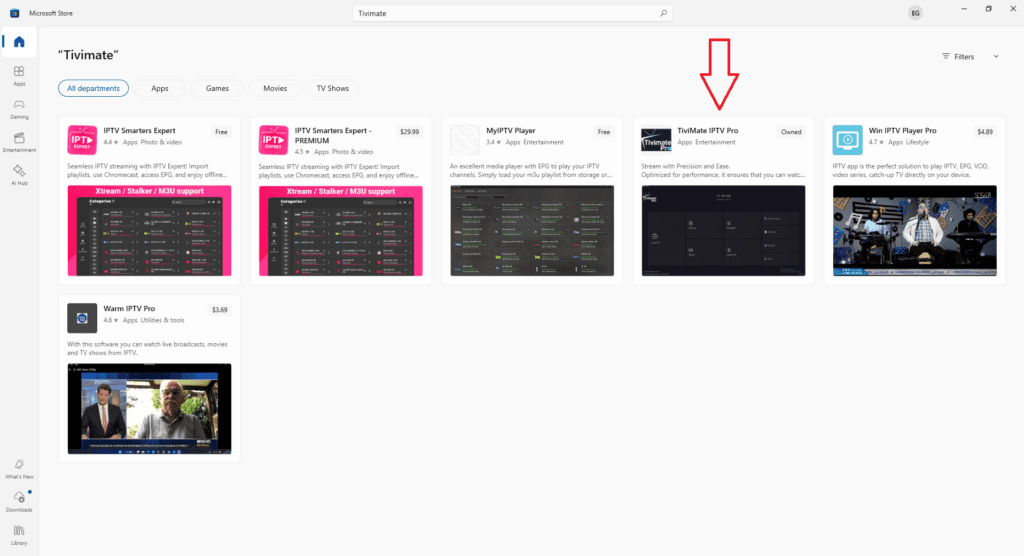
Step 3: Select TiviMate IPTV Pro and click INSTALL. After the app is installed, tap OPEN.

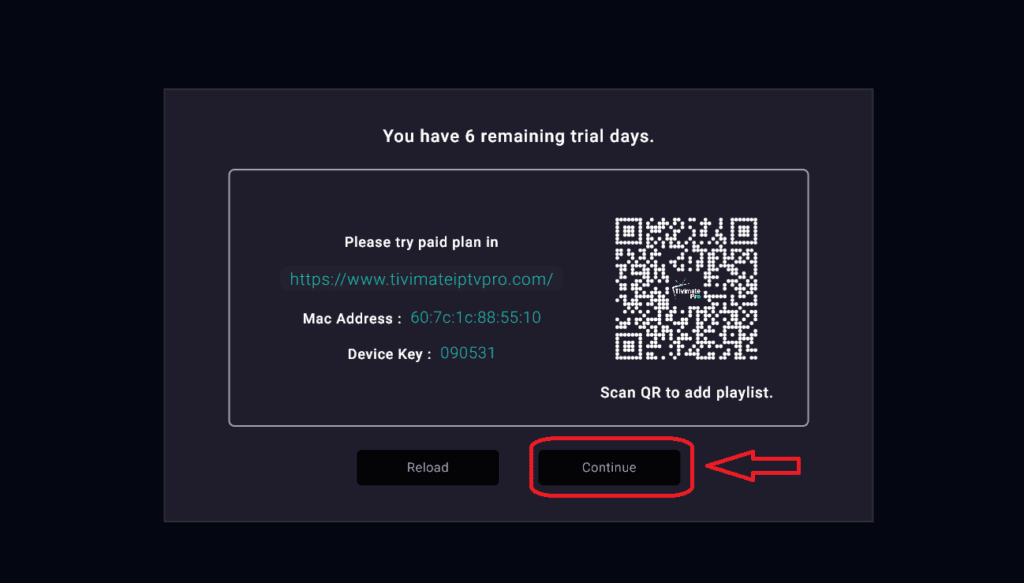
Step 4: When you open the app, your personal MAC address and Device key will be displayed. To add your playlist, go to the website www.tivimateiptvpro.com and enter your details as shown in the image below.

Step 5: After logging into the website, you will need to obtain the M3U URL or Xtream Codes from your provider to add the playlist. We recommend using the M3U URL when adding a list to this app because it works more efficiently.

Step 6: After adding your playlist on the app’s website, go back to the TiviMate app, click “Continue” and wait for the playlist to load.
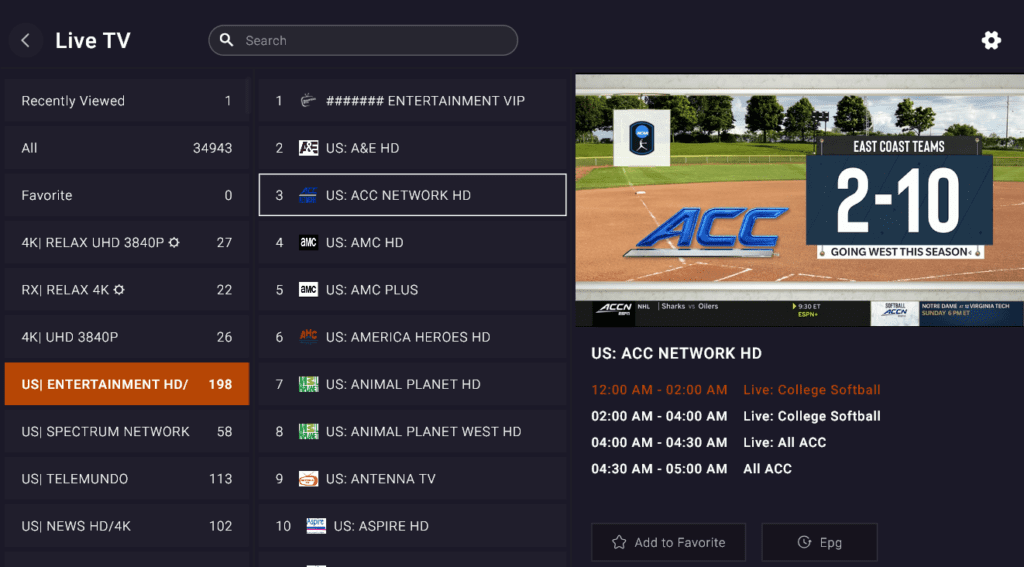
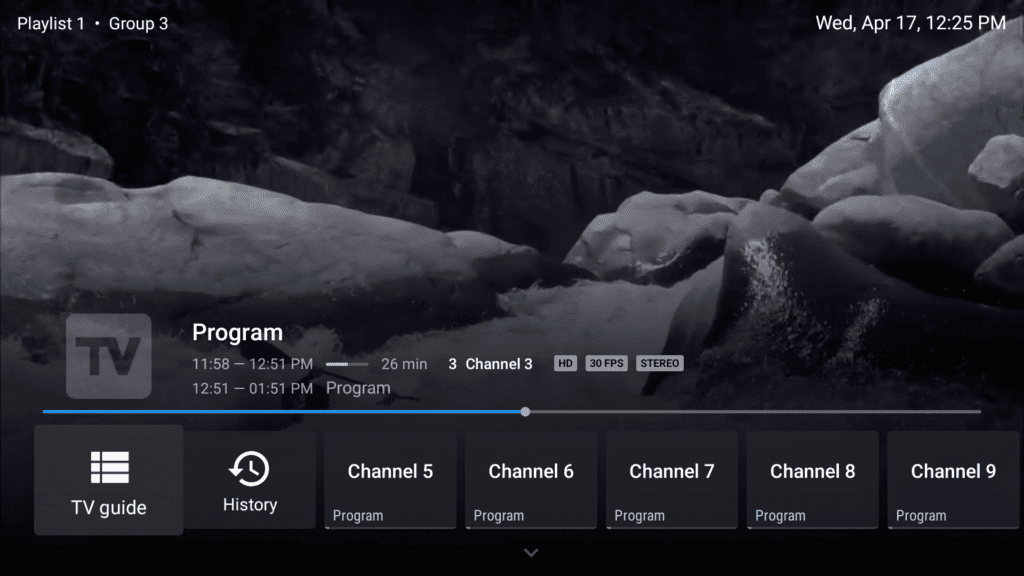
Step 6: Once the playlist is loaded, you will see a menu like the one below. You can choose what to watch, such as Live TV, Movies, or TV Series.

Method 2: Install TiviMate via Android Emulator (Advanced)
If you’re looking to access the Android version of TiviMate, there are a few simple steps you can follow to make the process straightforward and hassle-free.
✅ Step 1: Download and Install an Android Emulator
To successfully run TiviMate on your PC, it is essential to create a simulated Android environment. This can be achieved by utilizing reliable Android emulators. Some of the most highly recommended emulators include:
| Emulator | Features | Website |
|---|---|---|
| BlueStacks | Easy UI, Stable, Google Play access | bluestacks.com |
| LDPlayer | Lightweight, IPTV-friendly | ldplayer.net |
| NoxPlayer | Advanced control features | bignox.com |
Choose and download your preferred emulator from a trusted source that suits your needs and preferences. Once the download is complete, follow the provided instructions to install the emulator on your device. Ensure that you carefully go through each step to ensure a smooth and successful installation process.
✅ Step 2: Sign in with Google
After successfully launching the emulator, proceed to sign in using a valid Google account. This step is essential to gain access to the Play Store, where you can download and install various apps and games.
✅ Step 3: Search & Install TiviMate
- Launch the Play Store application within the emulator by navigating to the home screen and locating its icon. Once found, click on the Play Store icon to open it and access the various apps and services available for download.
- Type TiviMate IPTV Player
- Click Install
If the app doesn’t appear, you can download the TiviMate APK from a reliable source such as APKMirror. Once downloaded, simply drag and drop the file into your emulator to complete the installation process seamlessly.
✅ Step 4: Upload Your IPTV Playlist
- Launch TiviMate
- Navigate to the Settings menu and select the Playlist option.
- Enter your M3U URL or upload the playlist file manually
✅ Step 5: Customize the Interface
TiviMate provides users with a wide range of options to customize their viewing experience to suit their individual preferences.
- Add EPG links
- Reorder channels
- Group channels by genre
- Change themes and layout
Step 1: Open Google Chrome or any browser on your PC and visit www.bluestacks.com.
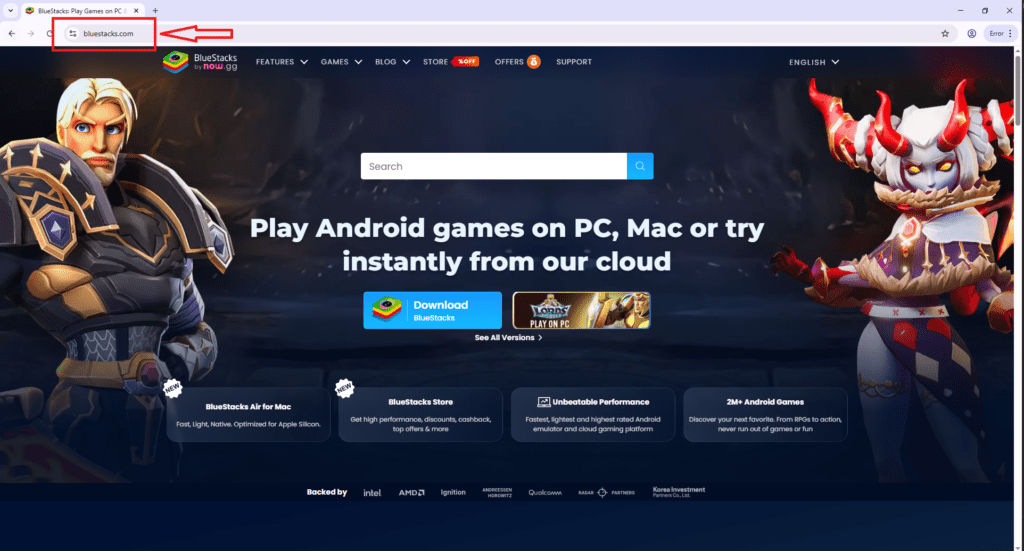
Step 2: Click the “Download” button located in the center of the page.

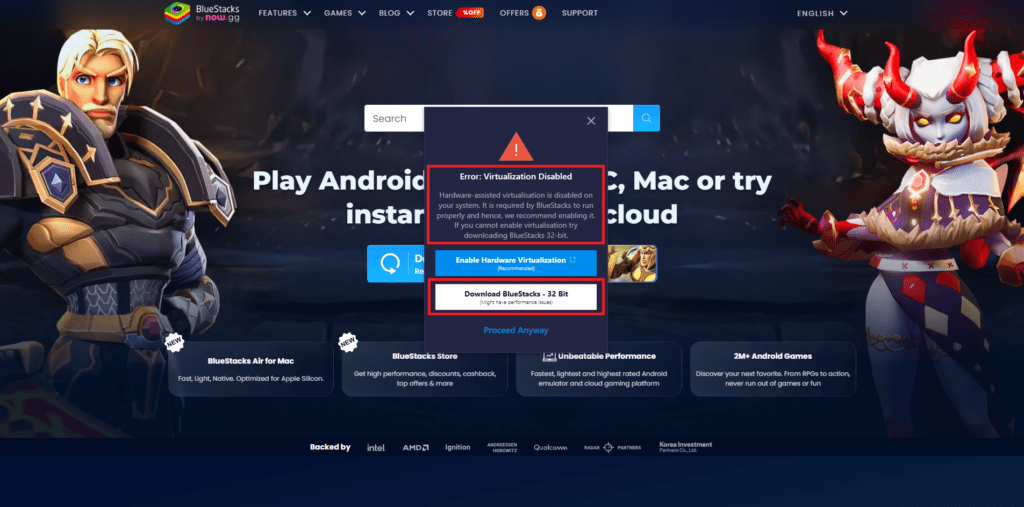
Step 3: When you open the downloaded file on your PC, if you encounter an error similar to “Virtualization Disabled,” you need to click on “Download BlueStacks – 32 Bit.”
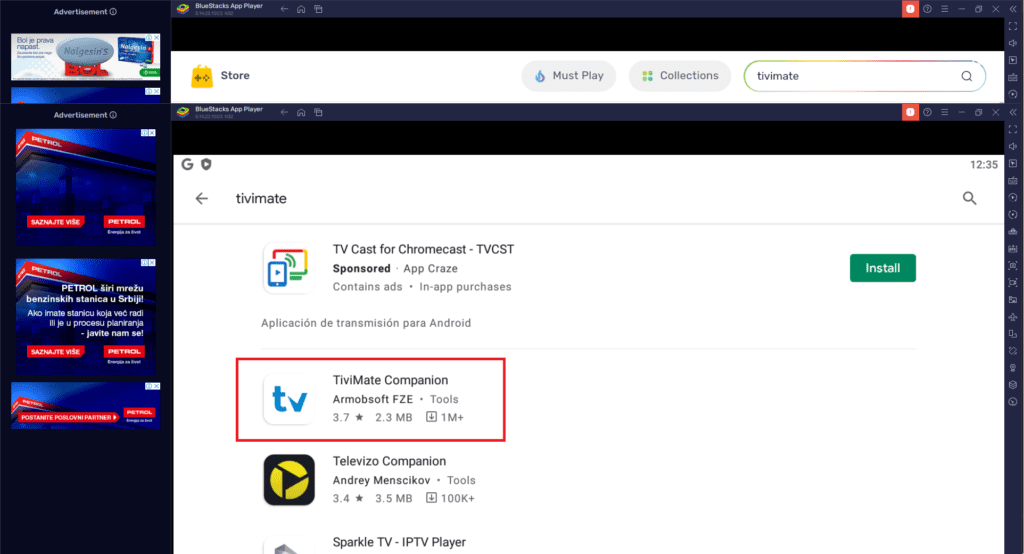
Step 4: Once the app is downloaded, open it and type “TiviMate” in the search bar.
Step 5: If you encounter an error like the one shown below while searching for Tivimate on BlueStacks, click on “Search in Google Play.” You will then need to log in with your Gmail account.
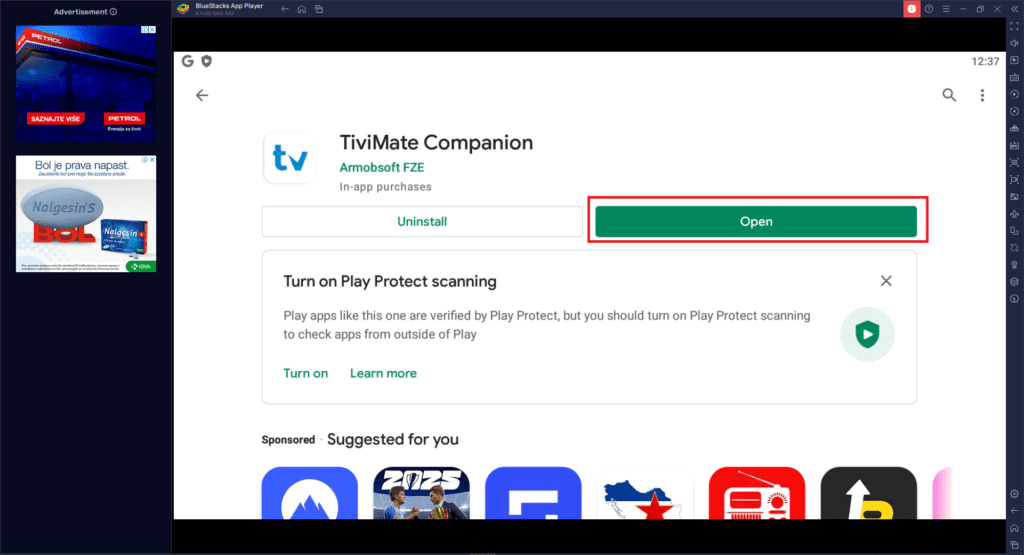
Step 7: After logging into the Google Play Store, locate the app named TiviMate Companion. Select it and click “Install.”
Step 8: After the app is installed, click “Open.”
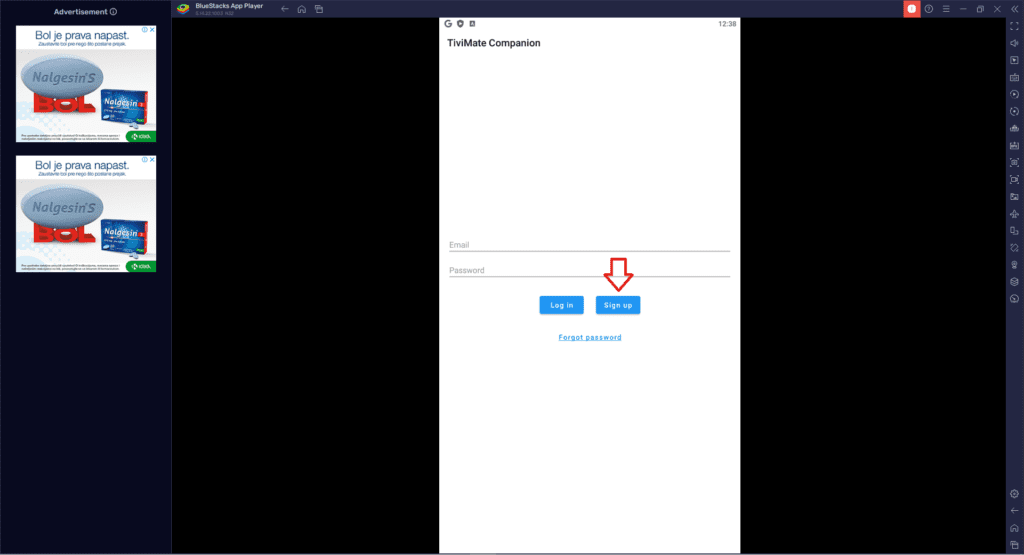
Step 9: When you open the app, you will see a Sign-Up button. Click on it and complete the Sign-Up process by entering the required details.
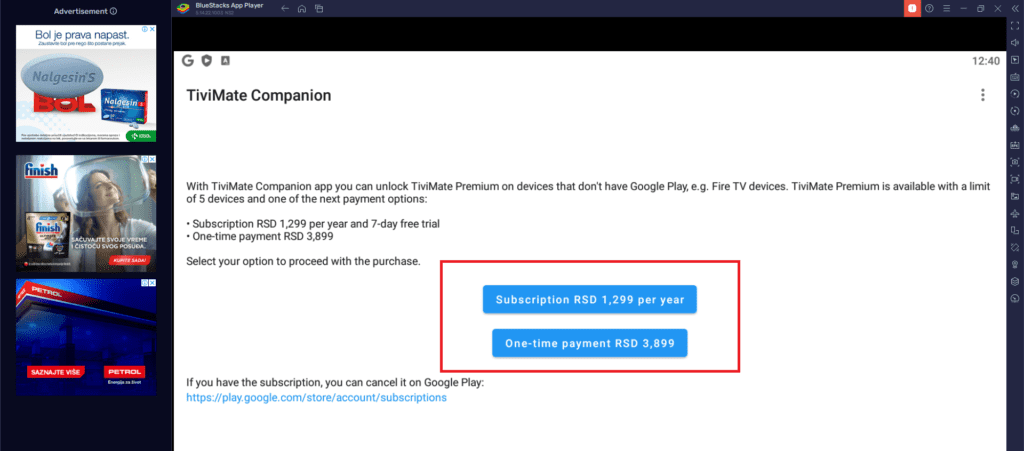
Step 10: Once you create your account on TiviMate, you will need to pay a fee of $9.90 per year or $30.90 for a lifetime subscription. This subscription covers up to 5 devices.
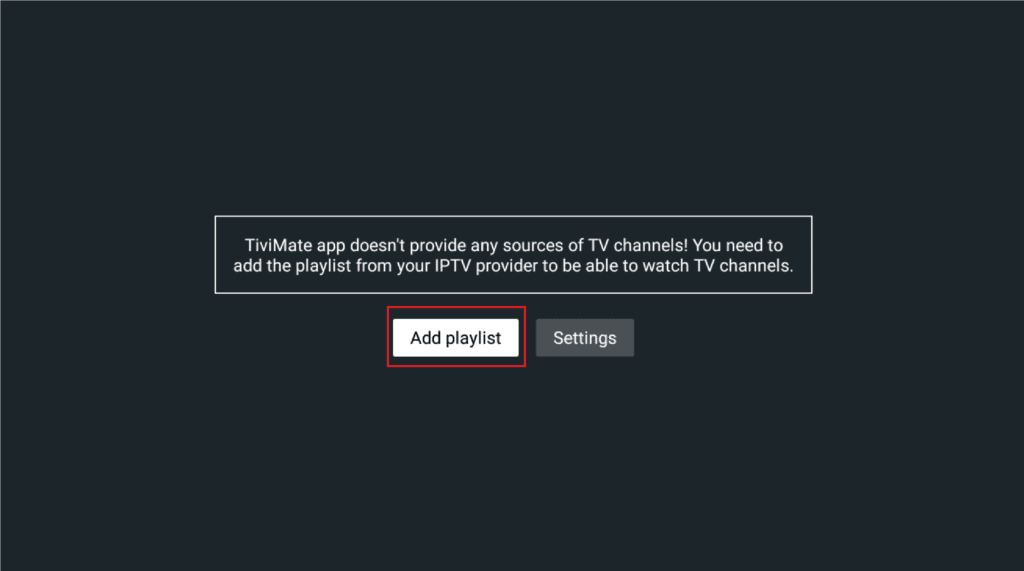
Step 11: Once you’ve made the payment, you can immediately add your playlist by clicking on ‘Add Playlist.‘
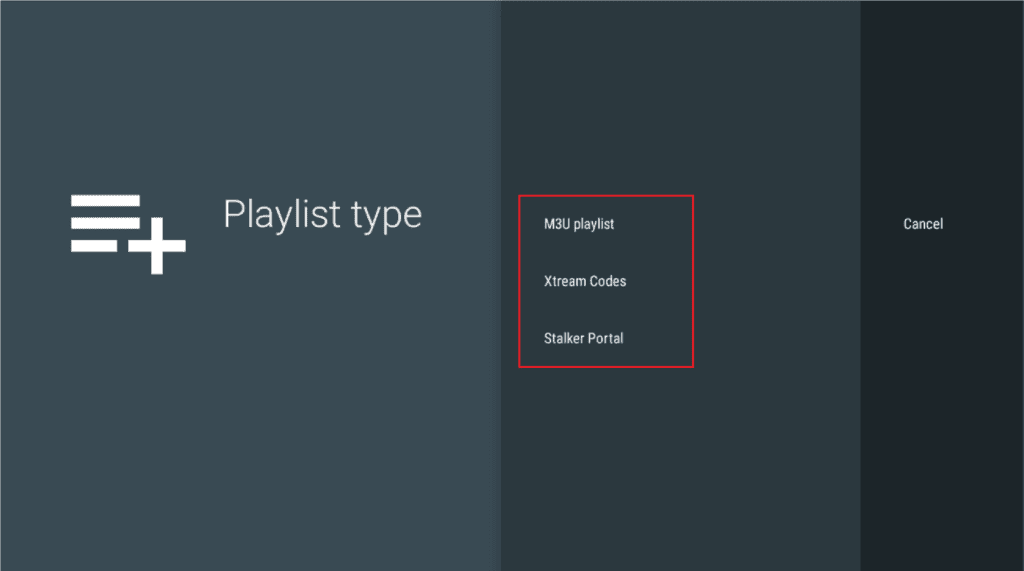
Step 12: Add your playlist using M3U Playlist, Xtream Codes, or Stalker Portal. We recommend using optimised playlist from your provider for this version, as it provides better performance.
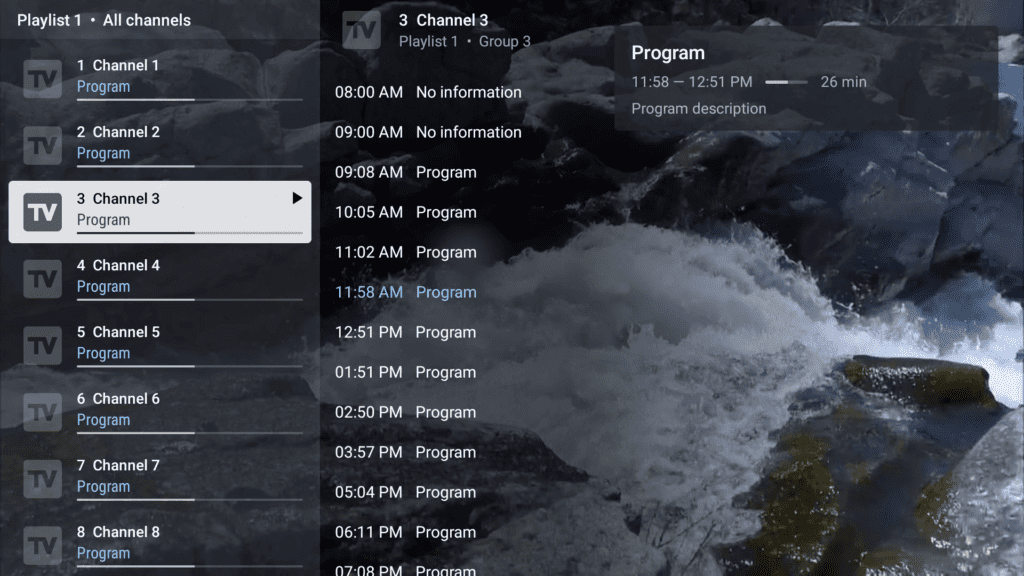
Step 13: You can now see the TV channels along with the TV guide.
System Requirements for Running TiviMate Smoothly
| Component | Recommended |
| CPU | Intel i5 or Ryzen 5+ |
| RAM | 8 GB or more |
| Storage | At least 1 GB free for emulator and TiviMate |
| OS | Windows 10 or 11 |
Common Troubleshooting Tips
- Having trouble installing TiviMate? Consider downloading the APK version as an alternative to using the Play Store for a smoother installation process.
- Playlist not loading? Make sure to carefully verify the M3U URL for any errors and ensure your internet connection is stable and working properly.
- Experiencing app crashes? Make sure to update both the emulator software and the TiviMate application to their latest versions for optimal performance and stability.
Bonus Section: TiviMate Alternatives for Windows Users
While TiviMate stands out as a leading IPTV player with a robust feature set, it’s far from being the only choice available. If you’re in the process of evaluating various options to find the best fit for your needs, there are several noteworthy alternatives that deserve your attention and consideration:
| IPTV Player | Pros | Platform Support |
| MyIPTV Player | Free, native to Windows, EPG & M3U support | Windows 10/11 |
| VLC Media Player | Lightweight, supports M3U & catch-up | Windows, macOS, Linux |
| Kodi with IPTV Add-ons | Full-featured, modular, recording support | Windows, Android, Linux |
| IPTV Smarters Pro (via emulator) | Popular UI, playlist management | Android / Emulated on PC |
Each option comes with its own set of strengths, which can vary depending on your specific needs and priorities. If you prioritize ease of use, some choices might stand out for their simplicity and straightforward setup. On the other hand, if customization is what you value most, there are options that allow you to tailor the experience to better match your preferences. For those seeking advanced features, such as DVR capabilities and recording functionalities, certain alternatives may offer more robust tools to meet those demands effectively.
Pro Tips for Best IPTV Experience on Windows
- Use a VPN: Many IPTV services are subject to geo-restrictions or may experience throttling by internet service providers. By using a reliable VPN, you can maintain your privacy, bypass regional limitations, and ensure stable and consistent streaming speeds without interruptions.
- Wired Connection Over Wi-Fi: Utilizing an Ethernet connection provides a significantly more stable and reliable experience, ensuring smooth, uninterrupted, and buffer-free streaming, even during high-demand usage.
- Keep Your Playlists Clean: Make it a habit to routinely review your playlists and remove any channels that are outdated or inactive. Additionally, check for broken links and delete them to ensure your playlists remain organized and functional at all times.
- Monitor RAM & Background Apps: To ensure smooth performance, especially when using an emulator, take the time to monitor your device’s RAM usage and close any unnecessary apps running in the background. This helps free up system resources and improves overall efficiency.
- Schedule Restarts: Periodically restarting the app or your entire system can be an effective way to free up memory, resolve minor glitches, and enhance overall performance. This simple practice can help ensure smoother operation and prevent potential issues from building up over time.
Common TiviMate Issues and How to Fix Them
Even with its impressive array of powerful features, TiviMate users occasionally run into certain challenges while using the app. To help you navigate these, here’s a comprehensive list of frequent issues that users face along with practical solutions to resolve them effectively:
🔄 TiviMate Stuck on Loading Screen
- Fix: To resolve the issue, try clearing the app’s cache or performing a full reinstallation of the application. If you are using an emulator, restart the entire system to refresh its state, and ensure that the emulator version is fully compatible with the app’s requirements and functionalities.
📺 EPG Not Updating or Missing
- Fix: Carefully verify your EPG URL to ensure it has been entered accurately and follows the correct XMLTV format. Additionally, confirm that the URL is functional and can be accessed directly through a web browser without any issues.
- Reintegrate the source into TiviMate by navigating to the settings menu. Once there, proceed to select TV Guide > Add Source, and follow the prompts to successfully add the desired source back into the application.
🔒 Playlist URL Rejected or Expired
- Fix: Verify with your IPTV service provider whether your M3U link remains active and functional. Keep in mind that certain M3U links may be restricted to specific IP addresses or are designed to expire within a 24-hour period, requiring regular renewal.
🚫 Channels Buffer or Freeze Frequently
- Fix: Transition from using a Wi-Fi connection to a more reliable and stable wired Ethernet setup for improved performance.
- Use a VPN if your ISP throttles IPTV traffic.
- Lower the video resolution to 720p or standard definition (SD) through the player settings to help reduce buffering and improve playback performance.
⚠️ Can’t Log into Premium TiviMate Account
- Fix: Access your TiviMate Companion App using the same account credentials you originally registered with. Please note that this application is exclusively available on Android devices, and activation must be completed from an Android platform.
These straightforward yet highly effective solutions offer practical ways to tackle most common frustrations you might encounter, sparing you the time and hassle of resorting to a factory reset on your device. By implementing these tips, you can often resolve issues quickly and efficiently without losing valuable data or settings. On the other hand, if you’re looking for a more in-depth understanding or additional guidance, we encourage you to check out our other blog posts, where we explore this topic in greater detail and provide comprehensive insights.
Final Thoughts
Whether you decide to go with the new Microsoft Store version of TiviMate or prefer to stick with the classic Android version accessed through an emulator, both choices provide an excellent level of versatility and adaptability tailored for Windows users. These options ensure that you can enjoy a seamless experience while meeting your specific preferences and requirements.
- The Microsoft Store version is incredibly quick and straightforward to set up, fully backed by official support, and an excellent choice for users seeking a reliable solution for everyday or basic tasks.
- The emulator version provides users with access to the Android interface that many are already accustomed to, offering a seamless and familiar experience. Additionally, it may include a broader range of customization options, enabling users to tailor the interface and functionality to better suit their individual preferences and needs.
No matter which route you choose, you can now fully immerse yourself in TiviMate’s IPTV experience right on your Windows 10 or Windows 11 computer. Best of all, there’s no need for any complicated workarounds or additional steps to get started.
Ensure you adhere to the best practices for organizing playlists, keeping your apps updated, and maintaining your devices properly to guarantee the most seamless and hassle-free experience.
Frequently Asked Questions (FAQ)
Q1: Is TiviMate officially available on Windows?
Absolutely! You now have the option to download the TiviMate IPTV Player conveniently through the Microsoft Store, making it easily accessible for users on both Windows 10 and Windows 11 devices.
Q2: What’s the difference between the Microsoft Store version and Android version of TiviMate?
The Microsoft Store version is specifically designed for Windows, making it seamless to install and integrate with the operating system, ensuring a hassle-free setup process. On the other hand, the Android version, which can be accessed through an emulator, might provide greater flexibility, additional customization options, and a more familiar interface for users who have been using Android devices for an extended period.
Q3: Can I use the same IPTV playlist on both Android and Windows?
Absolutely. As long as your IPTV service provider offers you an M3U URL, you can easily use it across multiple platforms without any hassle. This includes popular options such as Windows PCs, Android devices, and even streaming devices like the Firestick. With the right application or media player, you can seamlessly access your IPTV content on these platforms.
Q4: Do I need a premium TiviMate subscription to use it on Windows?
The basic version functions well and meets the needs of many users, offering a reliable and straightforward experience. However, for those seeking more robust functionality, advanced features such as the ability to manage multiple playlists, set up scheduled recordings, and customize the interface are available. These enhanced options require a premium license, which can be activated conveniently through the TiviMate Companion App, exclusively accessible on Android devices.
Q5: Why isn’t my playlist or EPG loading properly?
Ensure that all your links are functional and properly formatted for seamless operation. The EPG should strictly follow the XMLTV format, ensuring compatibility with your system. Additionally, playlists must adhere to the M3U link format to avoid any playback issues. It’s important to note that factors such as your internet connection quality and any restrictions imposed by your IPTV provider can also impact the successful loading and performance of these links.
If you found this guide useful and informative, please take a moment to like this post, share it with your friends or on your social platforms, and leave a comment below. We’d love to hear your thoughts, answer any questions you might have, or learn about your personal experience using TiviMate on Windows. Your engagement and support mean a lot to us and play a crucial role in enabling us to continue creating high-quality and valuable content for the IPTV community. 🙌


